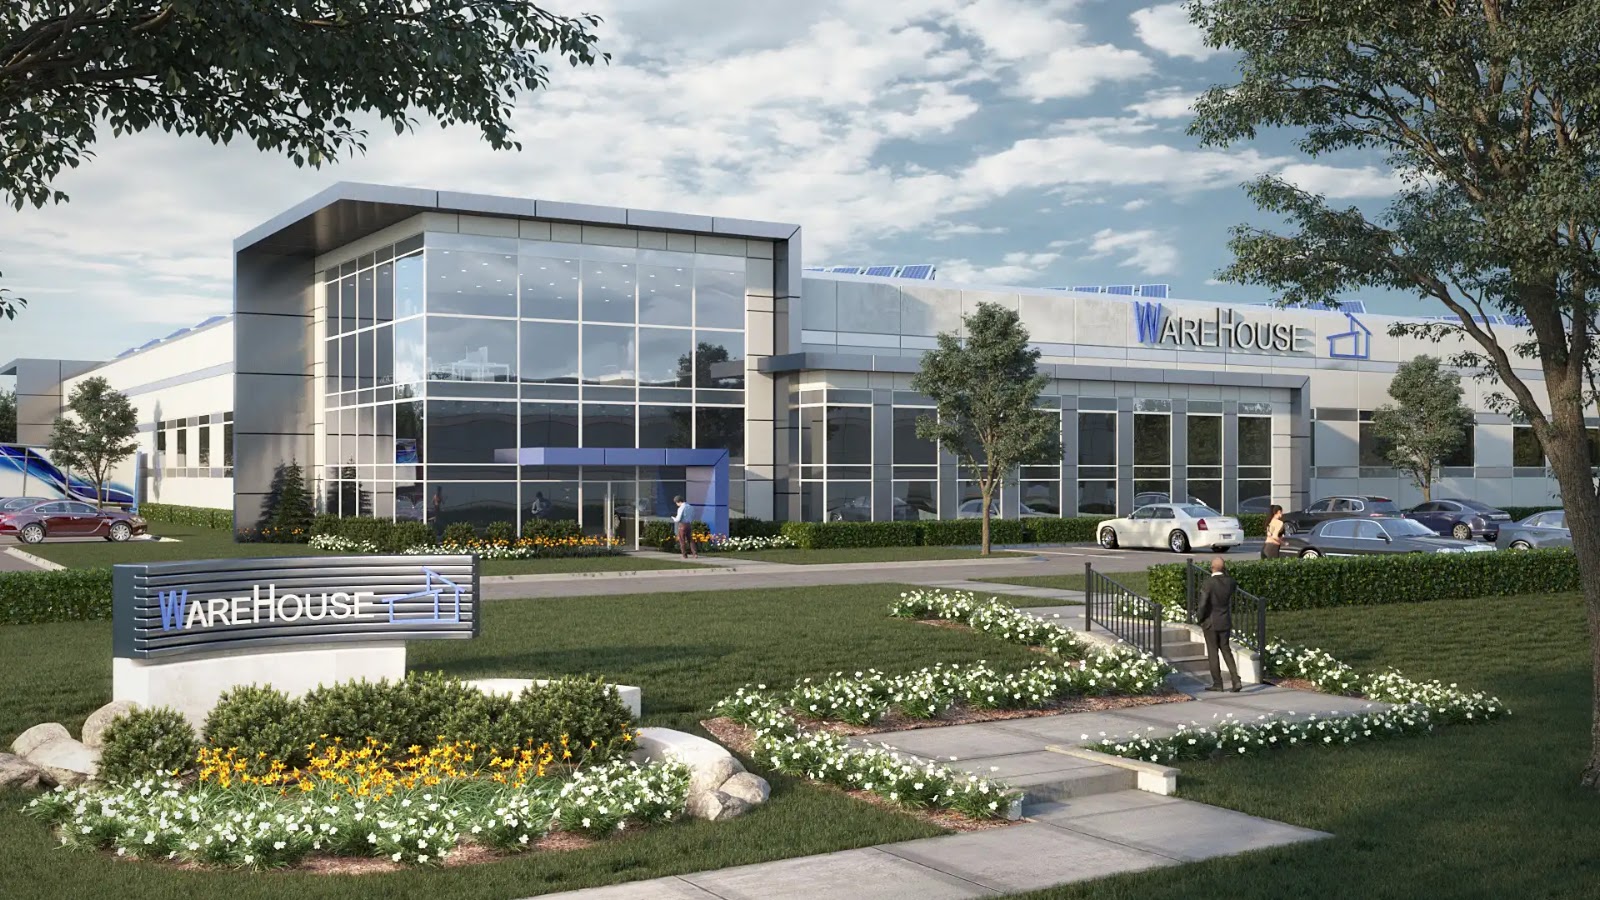
Exterior renderings should show how a proposed building will look in its setting, not just how polished the image can become. A useful exterior architectural visual makes the facade, scale, landscape, street presence, arrival points, and nearby context legible enough for review, presentation, or marketing decisions.
The right image changes with the assignment. A concept review may need massing and facade direction, while a planning discussion may need accurate context and a leasing deck may need a more refined hero view. The sections that follow explain what exterior renderings should communicate, what source information clients need to prepare, how to choose views, and where avoidable scope or review problems usually appear.
Table of Contents
- What exterior renderings are meant to show
- How the right exterior rendering changes by project stage and use
- What clients need to provide before exterior rendering starts
- How to choose the views that answer the right questions
- Where exterior rendering projects usually go wrong
- How to scope and review an exterior rendering package
- FAQ
- What to Do Next?
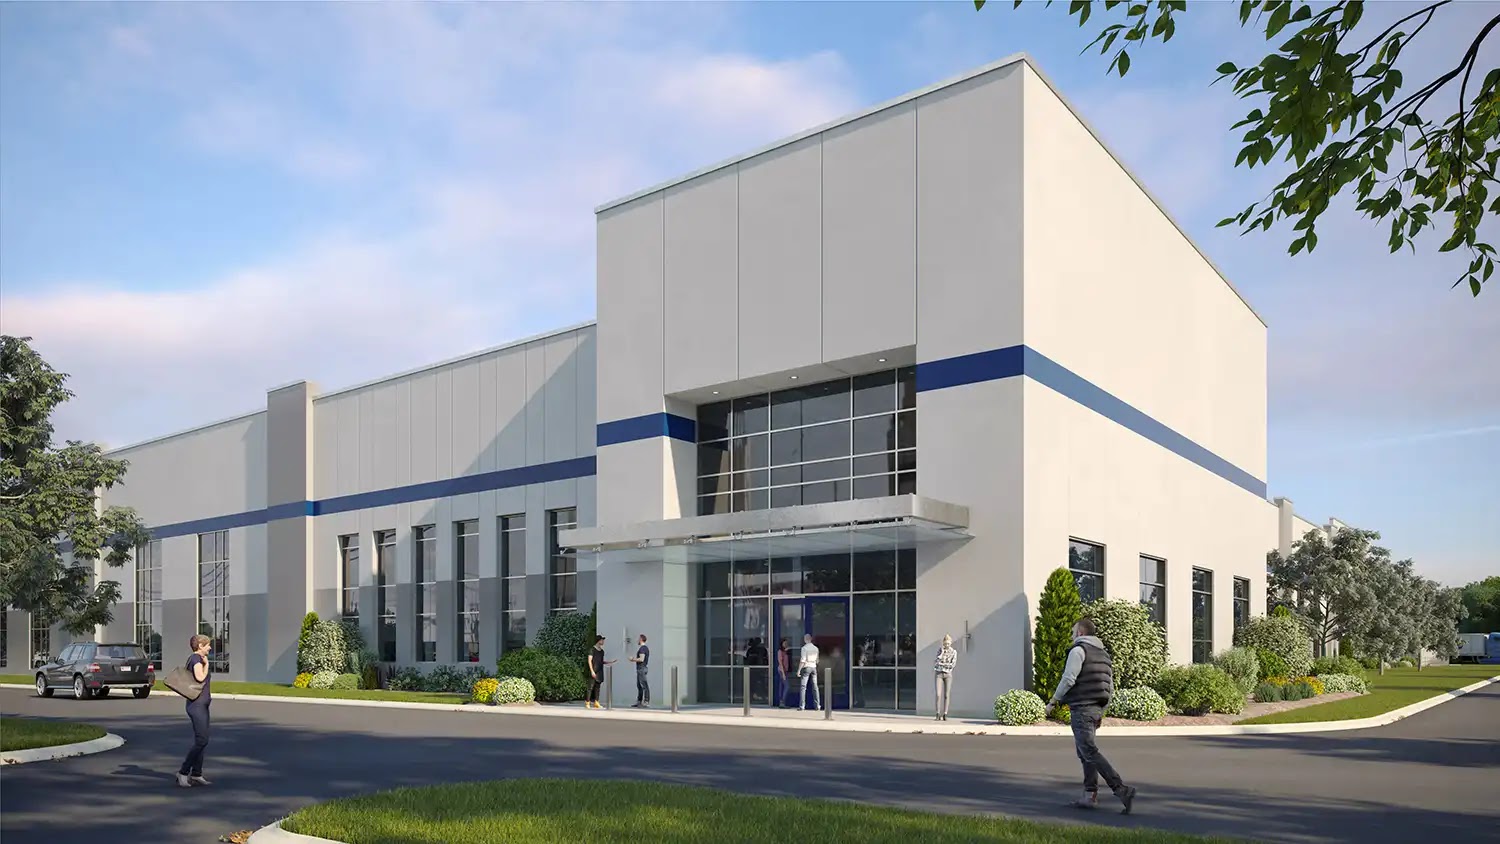
Commercial Entrance
Assess Entry Design and Street Presence
Examine the glass entry, facade balance, and landscaped edge in a commercial exterior context.
What exterior renderings are meant to show
At their best, exterior renderings explain the building as part of a place. They show what the facade is made of, how the massing meets the ground, how the entry is found, and how the project reads from the street or surrounding site. The image may be beautiful, but beauty is not the whole job. The rendering should answer practical questions that drawings alone may not answer quickly for owners, reviewers, investors, leasing teams, or community-facing audiences.
Facade clarity is usually the first test. Glazing proportions, mullion patterns, brick, metal panels, wood, stone, canopies, signage zones, balcony rails, and finish transitions should be specific enough to describe the design intent. If the image only shows broad gray walls, generic glass, and attractive lighting, it may look finished while still leaving the most important exterior decisions unresolved.
Scale and context matter just as much. A building exterior rendering becomes easier to judge when it includes the curb line, sidewalk edge, street trees, adjacent buildings, site grades, pedestrian paths, access points, and the portions of parking or service areas that affect the public face of the project. People, cars, planting, paving, and neighboring structures should not be filler. They help the viewer understand proportion, arrival, and the character of the street frontage.
That does not mean every rendering needs maximum detail or a fully built neighborhood model. The right amount of context depends on the question the image needs to answer. A facade study may focus tightly on materials and articulation. A streetscape rendering may need more surrounding fabric. A development presentation visual may need enough context to explain how the project fits into a broader site story.
How the right exterior rendering changes by project stage and use
An exterior rendering for early concept review should not be scoped the same way as an exterior rendering for marketing or planning discussion. Early images often need to keep some flexibility. They can test massing, facade rhythm, entry location, and general street presence without pretending that every product, color, planting species, or lighting condition is final.
During design development, the rendering usually needs more commitment. Materials become less symbolic and more specific. The exterior finish schedule, window proportions, balcony details, parapet conditions, landscape assumptions, and ground-plane treatment start to carry more weight. At this point, a rendering can help the team compare design options, review public-facing elevations, and notice conflicts between drawings, material intentions, and site conditions.
Planning, entitlement, or permit-related visuals may need a different emphasis. They often need to explain massing, scale, street relationships, neighborhood fit, and visible context. Some jurisdictions may request particular view types, colored renderings, night views, or surrounding context, while others may not. Those requirements should be checked locally before the rendering package is scoped, because a marketing-style hero image is not always the same as a submission-oriented context image.
Marketing, leasing, and investor presentation images usually ask more from the final look. They may need refined lighting, carefully selected weather or time of day, high-resolution delivery, and a view that gives the project a clear public identity. Day, dusk, night, or seasonal variants can be useful when they have a defined use, but they should be deliberate scope choices rather than assumed extras.
The practical point is simple: decide the audience and use before deciding the image count or polish level. A planning reviewer, ownership group, leasing team, buyer, internal design team, and public audience may each need a different kind of visual evidence.
What clients need to provide before exterior rendering starts
The most useful preparation is not sending every file available. It is identifying which information is current, authoritative, and safe to rely on. Current architectural drawings, elevations, sections, site plans, reflected ceiling plans where exterior soffits or entries matter, and BIM or CAD files can all help, but the rendering team needs to know which version governs the work.
If a Revit model, IFC file, DWG package, or other model source is provided, it should not be treated as automatically complete. The team should clarify authorship, model reliability, Level of Development, and authorized uses. A design coordination model may contain useful geometry, but it may not include final facade details, landscape, signage, grading, or material assignments in a form that is ready for presentation imagery.
Material information should be specific enough to prevent guesswork. Helpful references include an exterior finish schedule, manufacturer names, product lines, color references, sample photos, brick blends, metal panel finishes, glazing tint, wood tone, stone type, and notes showing where each material occurs. Even a good visualization team cannot accurately infer a design intent that has not been documented or explained.
Site and landscape information should be treated as part of the exterior brief. That may include survey information, site photography, adjacent building references, topography, property edges, curb lines, sidewalks, planting intent, paving materials, access points, parking entries, loading zones, and exterior lighting concepts. The level of detail should match the project stage, but the ground plane should not be left as an afterthought.
The brief should also define the intended use, audience, view list, aspect ratios, resolution needs, delivery formats, review rounds, and usage expectations. A web image, investor deck image, brochure image, construction fence graphic, and planning exhibit may require different crops, resolutions, or file handling. Confirming those needs early helps the rendering package serve its actual destination.
Free Guide
Plan Better Renderings Before Your Next Presentation
Use this quick guide to prepare clearer visual direction before project meetings, marketing reviews, or stakeholder presentations.
- Clarify the views your team needs before rendering starts
- Compare exterior, interior, and amenity visuals with more focus
- Prepare stronger notes for design, leasing, or marketing discussions
A practical checklist to help your team prepare.
How to choose the views that answer the right questions
Camera selection is not only an artistic decision. Each view should exist because it answers a question someone on the project needs answered. If the question is overall identity, a hero exterior may be appropriate. If the question is pedestrian arrival, the camera needs to show the approach, entry, sidewalk, canopy, planting, lighting, and building base. If the question is neighborhood fit, a wider context view may be more useful than a dramatic close-up.
Hero views are often valuable because they give a project a memorable public face. They can work well for websites, investor decks, leasing material, and early presentations to ownership. But a single hero view rarely explains everything. It may hide the less photogenic side of the site, miss the service entry, avoid a difficult grade change, or fail to show how the building relates to neighboring properties.
Streetscape renderings and pedestrian-level views help decision-makers judge frontage, scale, arrival sequence, ground-floor transparency, signage zones, landscape, and public-realm character. Aerial or wider context views can clarify site organization, topography, roof form, parking relationships, and how the project sits within a block or district. Facade close-ups may be useful when the main decision is material character or exterior detail.
Not every project needs every view type. A small facade update may need only a focused material view and a street-level image. A mixed-use development may need a hero view, a streetscape view, an arrival view, and a context view. A project with sensitive access, parking, or service conditions may need one view that explains those relationships clearly rather than hiding them for the sake of a cleaner composition.
A practical way to select views is to name the purpose of each image before production begins. For example: hero identity for investor deck, pedestrian arrival for leasing and wayfinding review, streetscape context for planning discussion, facade close-up for material approval, and service access view for operations review. If a view has no clear reason to exist, it may not belong in the first package.
Where exterior rendering projects usually go wrong
Many exterior rendering problems begin with vague material direction. Notes such as light brick, dark metal, or warm wood may be enough for early conversation, but they are not enough for a dependable facade rendering if the image is expected to represent a specific design. Broad notes force assumptions, and those assumptions can make the building look plausible without matching what the architect, owner, or marketing team actually intends.
Another common problem is starting production before the intended use is clear. An internal design review image, planning context image, investor presentation visual, and leasing campaign image do not have the same priorities. If the team has not decided what the rendering needs to support, the image may become too polished for concept work, too vague for planning discussion, or too narrow for marketing use.
Late camera changes can also create more disruption than they appear to. Changing a view after modeling, landscape, lighting, entourage, and context are already developed may require reworking composition, detail, reflections, shadows, and surrounding site elements. That does not mean cameras can never change, but initial view approval should be treated as a real checkpoint.
Exterior rendering scope can become unclear when view count, revision rounds, resolution, file formats, source-file expectations, and usage rights are left informal. These details do not need to be complicated, but they do need to be stated. A team preparing images for a website, printed brochure, investor presentation, and construction signage should not discover at the end that the files were created only for a narrow crop or one presentation format.
The most subtle problem is the polished image that does not answer the real question. A rendering can have convincing lighting, attractive planting, and a dramatic sky while still failing to show street presence, scale, access, frontage, material logic, or neighborhood fit. Reviewers should ask whether the image explains the project, not only whether it looks good.
How to scope and review an exterior rendering package
A grounded exterior rendering package usually starts with a brief review and source-file check. The team confirms the intended use, target audience, current drawings or model files, material references, site information, view list, delivery needs, and review process. This early step is where missing information should surface, before it becomes embedded in a nearly finished image.
From there, the work typically benefits from staged approvals. Camera angles should be reviewed before detailed production moves too far. Material direction should be reviewed before final lighting and finishing. Test renders should be used to check composition, facade reading, landscape assumptions, context accuracy, and any unresolved design questions. Final review should focus on refinements, not first-time decisions about major views or materials.
Review responsibility should be clear. The architect may need to approve facade geometry, materials, mullion patterns, and design intent. The landscape architect may need to review planting, paving, trees, and ground-plane treatment. The project manager may need to coordinate comments and track which drawings are current. The marketing or leasing team may need to confirm crops, resolution, aspect ratios, and final publishing uses.
It also helps to separate design comments from presentation comments. A note about changing the cladding pattern is different from a note about warming the light or adjusting the crop. Both may be valid, but they affect production differently. Mixing them late in review can make the process harder to manage.
Final delivery should be matched to real use rather than treated as a generic image handoff. Website banners, social crops, printed brochures, investor decks, planning boards, signage, and press images may each need different aspect ratios or resolutions. Confirming those outputs early helps the final exterior renderings remain usable across the places they are expected to appear.
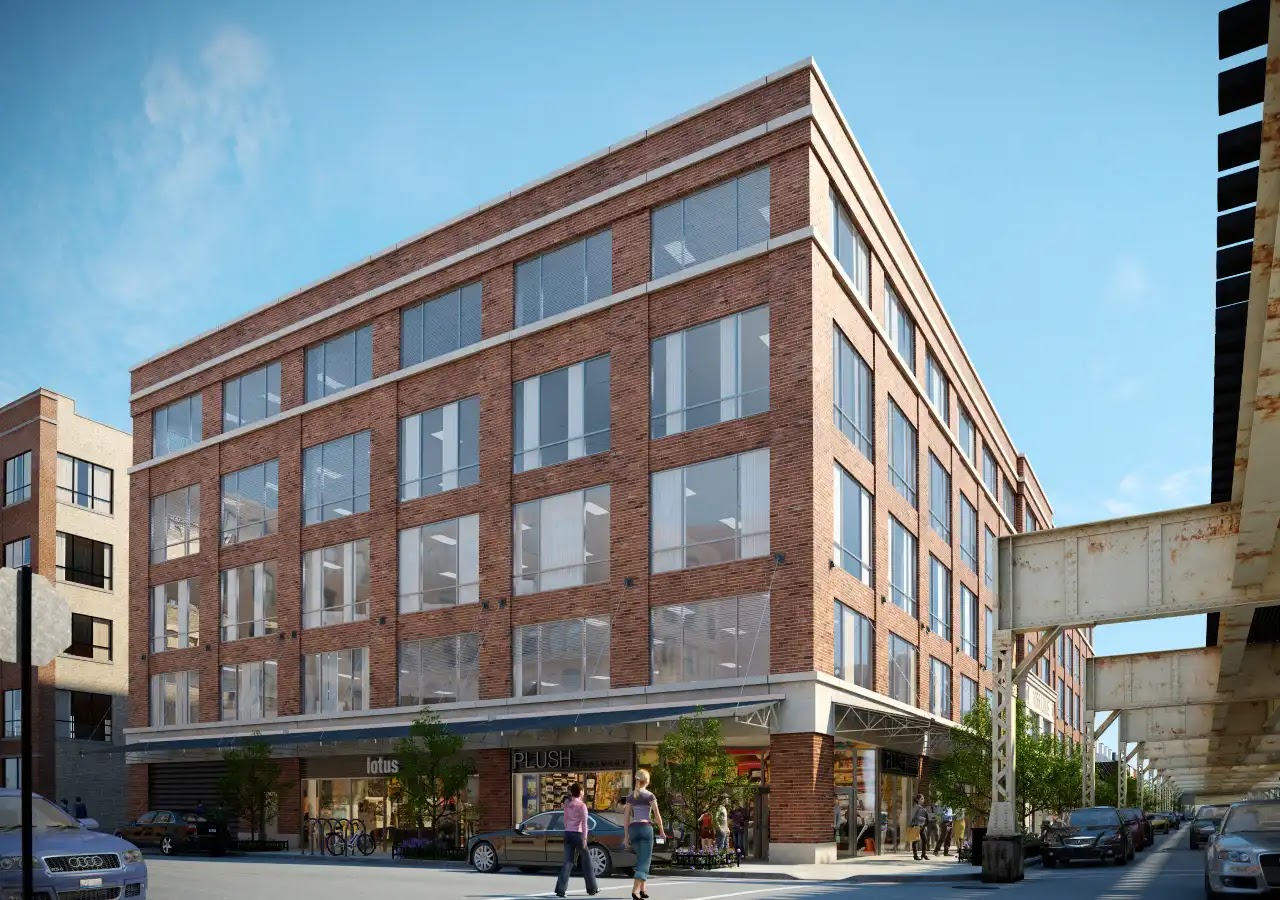
Mixed-Use Exterior
Assess Street-Level Retail and Building Massing
Examine storefront placement, facade rhythm, and the building's street presence in context.
FAQ
What files are usually needed for exterior renderings?
Most projects benefit from current drawings or BIM/CAD files, exterior elevations, site plans, material and color schedules, landscape information, site photos, survey or context references, and a clear view and delivery brief. Accepted file types vary by workflow, so formats should be confirmed before production starts.
Can an architect's BIM model be used directly for an exterior rendering?
It can help, but it should not be assumed to be complete or authoritative for visualization. Model reliability, authorship, Level of Development, facade detail, site content, and authorized uses should be clarified before the rendering team relies on it.
How many exterior views does a project usually need?
The right number depends on the audience, project complexity, and intended use. A simple package may need a hero view and a street-level view, while a larger development may need pedestrian arrival, streetscape, aerial context, facade close-up, or access-related views where those questions matter.
Do planning or permit exterior renderings need special views or formats?
They may, but requirements are jurisdiction-specific. Some locations may ask for colored views, night views, neighborhood context, or particular exhibit formats. Local planning or building department requirements should be checked before the rendering scope is finalized.
What makes exterior renderings look generic or unconvincing?
Common causes include under-specified materials, missing context, repetitive planting, weak paving and ground-plane detail, unclear entries, and views that do not show how the building meets the street or surrounding fabric. Better briefing and targeted review can correct many of these issues.
Free Guide
Plan Better Renderings Before Your Next Presentation
Use this quick guide to prepare clearer visual direction before project meetings, marketing reviews, or stakeholder presentations.
Prefer to talk it through? Email us at info@rmdesignstudio.com or call 630.540.1222.
What to Do Next?
Before starting or revising an exterior rendering package, define the decision each image needs to support. Is the work for concept review, planning discussion, investor communication, leasing, public marketing, or internal coordination? That answer should guide the amount of context, finish detail, polish, and delivery preparation.
Then identify the authoritative source information. Mark which drawings, model files, finish schedules, landscape references, site photos, and context materials are current. If BIM or CAD content is being used, confirm what can be relied on and what still needs interpretation or supplemental reference.
Prepare a short view brief. Name each proposed image, describe the question it should answer, and assign who reviews the relevant parts: facade materials, landscape assumptions, context accuracy, camera angles, and final output requirements. Also confirm aspect ratios, resolution, revision checkpoints, file-use expectations, and any local planning or permit requirements that may affect the package.