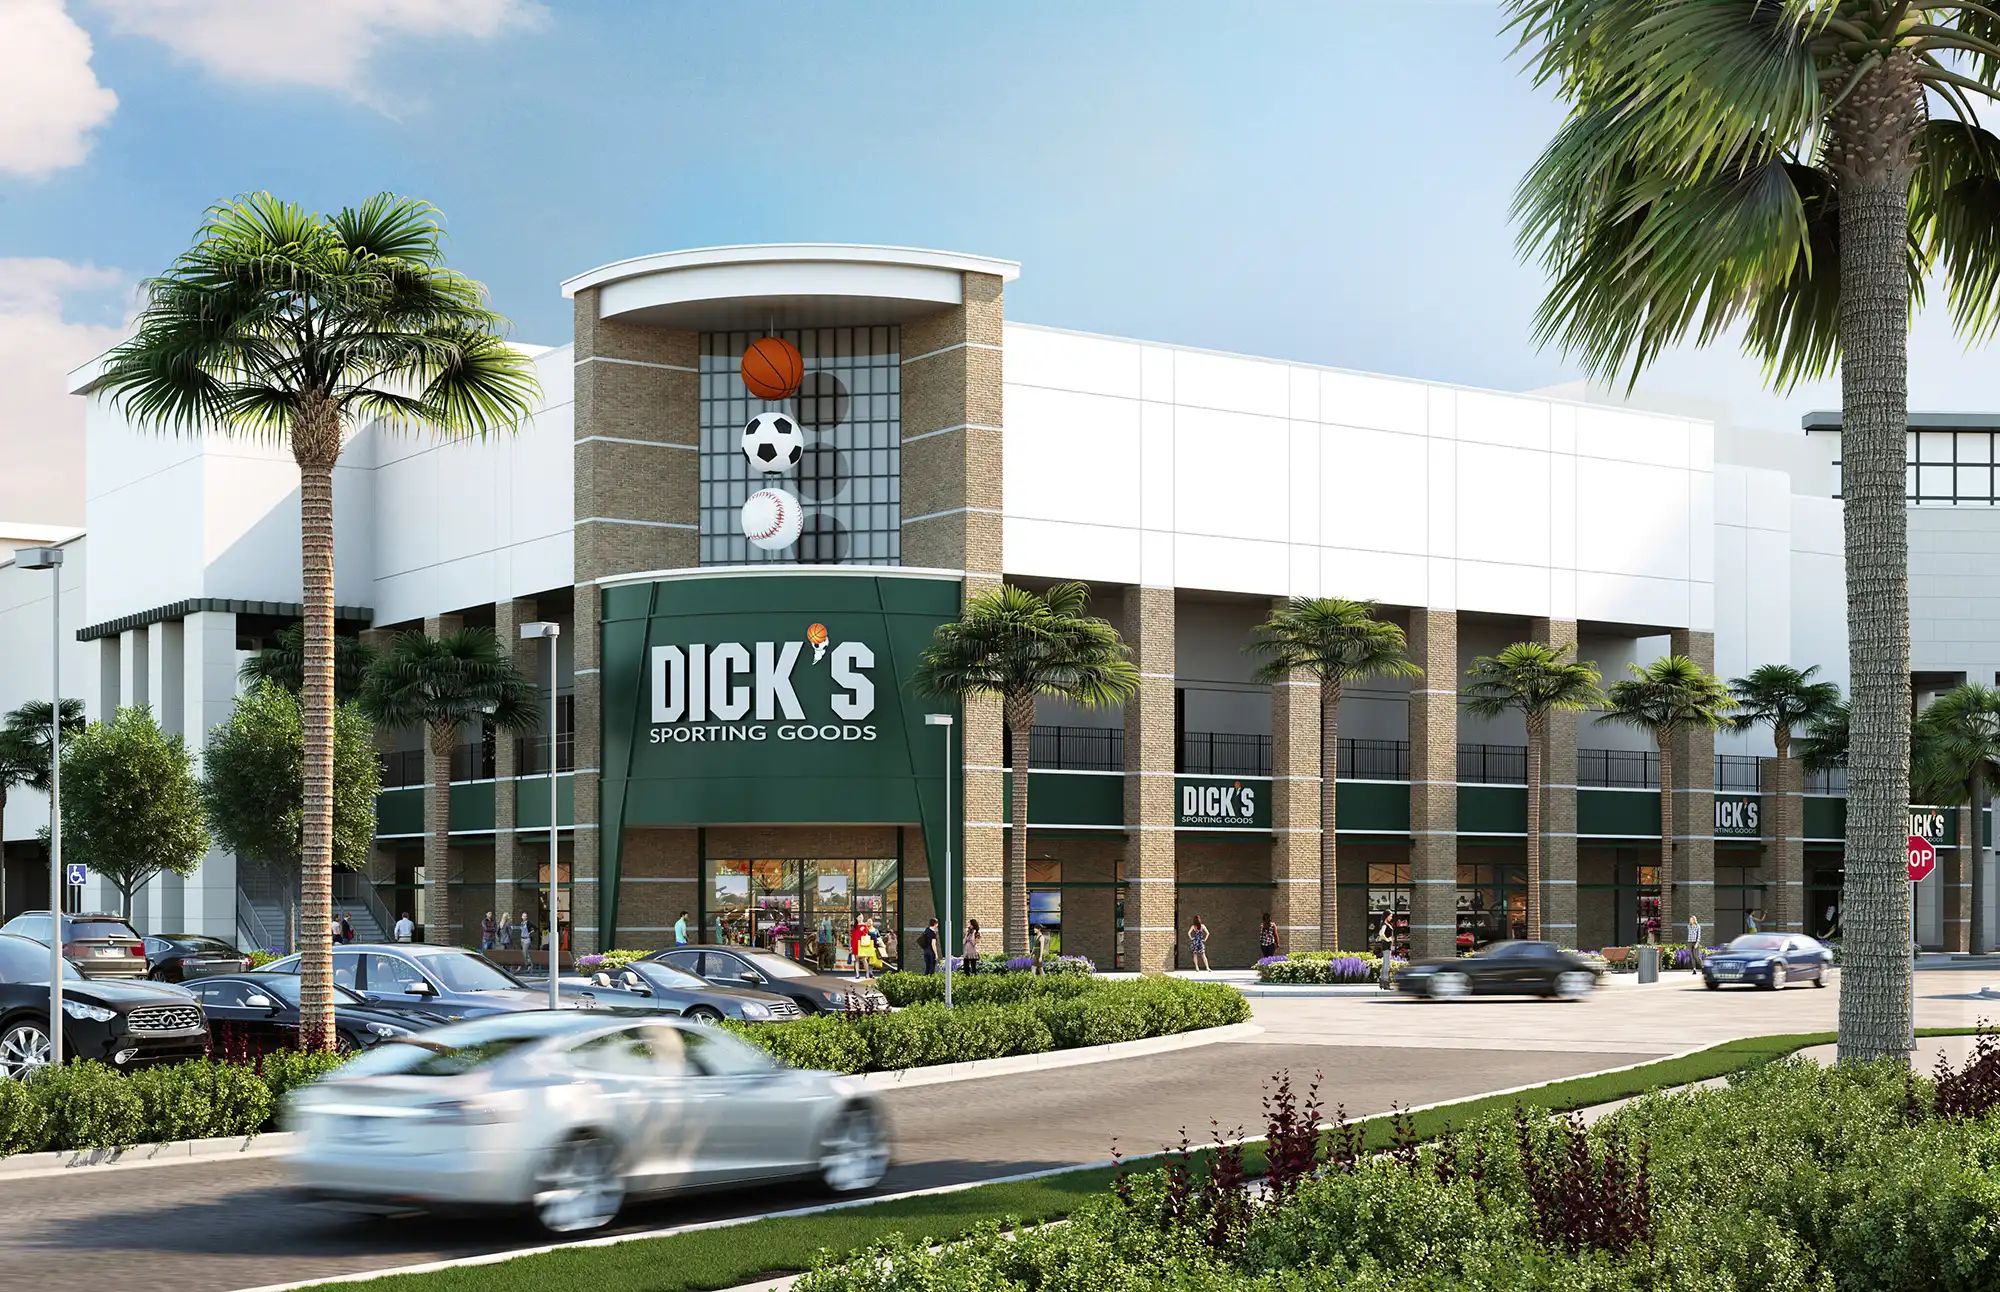
A flagship store rendering package is usually more than one polished image. It often starts with one or more hero photoreal stills, then adds a planned sequence of exterior views, storefront close-ups, entry sightlines, wide interior perspectives, category-zone views, and selected detail shots. Animation, walkthroughs, or interactive panoramas can be useful, but they should be added because the project needs them, not because every flagship concept requires them.
The details behind the images matter as much as the images themselves. A useful package depends on the intended audience, current design information, fixture and merchandising assumptions, review milestones, output formats, and future reuse needs. The sections that follow explain what to include, what to prepare, how to review the work, and which handoff questions should be settled before final production.
Table of Contents
- What a flagship store rendering package usually includes
- Choose the render types by what the visuals need to do
- What the visualization team needs from you before production starts
- How the review process should be staged to avoid expensive rework
- Output specs, reusable files, and handoff questions to settle early
- When interactive or real-time flagship store rendering is worth it
- FAQ
- What to Do Next?
RM Design Studio
Planning a rendering project?
Talk with RM Design Studio about your project, the views you need, and your timeline.
What a flagship store rendering package usually includes
A strong flagship store rendering package is usually organized around the decisions the team needs to make and the story the location needs to tell. The core deliverables are often premium photoreal stills, with one hero image carrying the main impression of the store. That hero may be a street-level exterior, a storefront view, a dramatic entry perspective, or a wide interior view that captures the brand environment.
For many flagship projects, one image is not enough to explain the concept clearly. A fuller package may include an exterior hero view, a storefront close-up, an entry sightline, a wide interior perspective, category-zone views, a checkout or service area, and a few fixture or material detail shots. These images help different reviewers understand the architecture, merchandising, customer path, lighting mood, signage, and branded surfaces without relying on a single angle to do too much.
The most useful view list is not necessarily the longest one. It should be tied to the intended use of the rendering package. A board presentation may need a concise set of persuasive hero images. A landlord review may need clear storefront, signage, and façade information. A launch package may need stronger atmosphere, customer journey, and crop planning for web, press, and campaign use.
Animation and interactive panoramas are optional additions. They can help when remote reviewers need to understand movement through the store, or when the launch story depends on the experience unfolding over time. Still, they should not be treated as automatic upgrades. A carefully chosen still image sequence can often explain a flagship concept more efficiently than a complex immersive package, especially when the main task is review, comparison, or controlled presentation.
Choose the render types by what the visuals need to do
The right render type depends on what the images need to clarify. Still renderings are often enough when the purpose is executive review, landlord presentation, internal design discussion, press imagery, or a controlled set of marketing crops. They let the team choose exactly what the audience sees: the best façade read, the strongest entry sequence, the most important product zone, or the clearest interior brand moment.
Animated walkthroughs become more useful when the customer journey matters. If reviewers need to understand how a visitor moves from the street into the store, passes key display zones, reaches a service counter, or experiences a sequence of rooms, motion can explain relationships that are harder to show in a single view. Interactive panoramas may also help remote teams look around a space without scheduling a live model review.
The hero image should be chosen with care. If the flagship is meant to establish street presence, the hero may need to emphasize façade materials, glazing, signage, neighboring context, and lighting. If the interior brand experience is the main focus, a wide interior view may be more useful. If merchandising is central, a category-zone view may carry more weight than a dramatic exterior.
Daytime and dusk exteriors also do different jobs. A daytime view can make form, material, shadow, and façade composition easier to evaluate. A dusk view can show storefront glow, interior lighting mood, and the store’s evening presence in the street. Neither is inherently better. The better choice depends on whether the team needs architectural clarity, atmosphere, or both.
It is also worth thinking about crops before final production. A horizontal website hero, a vertical social crop, a presentation slide, and a press image may all frame the same store differently. If those needs are known early, camera angles can be composed with enough breathing room for the formats that matter.
What the visualization team needs from you before production starts
Good retail rendering depends on good source information. Floor plans are only the beginning. The visualization team also needs sections, reflected ceiling information, or confirmed ceiling heights so the space has the right volume. Without that information, even a polished image can misread the height, rhythm, and scale of the store.
Retail fit-out information is especially important for a flagship. Fixture catalogues, display systems, shelving depths, service counters, product placement assumptions, and merchandising density often define the environment as much as the architecture does. If those items are missing, the team may be forced to infer display logic, product hierarchy, and circulation clearances. Those guesses can become costly when reviewers notice them late.
Material and finish information should be gathered as early as practical. Glazing, flooring, wall finishes, branded panels, millwork, metal trim, lighting temperature, signage, and specialty surfaces all affect the reading of the store. A mood board can help, but it does not replace a finish schedule, marked-up elevations, or clear references for the materials that are already selected.
BIM or CAD files can be very useful when they are current and well organized. They do not remove the need for briefing. The team still needs to know which model version is authoritative, which areas are in scope, which information is only schematic, and whether recent design changes have been incorporated. If the model, drawings, and markups disagree, someone should identify the source of truth before rendering begins.
A strong brief should also define the audience, purpose, requested deliverables, and review responsibility. A package for brand leadership may be judged differently from one used by store design, merchandising, leasing, marketing, or property teams. Naming those reviewers early helps the visualization process focus on the issues each group is likely to notice.
Free Guide
Plan Better Renderings Before Your Next Presentation
Use this quick guide to prepare clearer visual direction before project meetings, marketing reviews, or stakeholder presentations.
- Clarify the views your team needs before rendering starts
- Compare exterior, interior, and amenity visuals with more focus
- Prepare stronger notes for design, leasing, or marketing discussions
Enter your email to access the guide.
How the review process should be staged to avoid expensive rework
Flagship rendering works best when review is staged. Early concept comps can check the main camera angles, massing, fixture placement, storefront expression, merchandising logic, and mood before the team spends time on fully polished photoreal images. These early views do not need to be perfect. Their purpose is to reveal whether the direction is right.
Going straight to final-quality renderings can push basic decisions too late. A polished image may look convincing while still carrying unresolved questions about signage scale, product density, circulation, material contrast, or lighting intent. When those issues are discovered after final production has begun, revisions tend to affect more than a single surface or object.
Different reviewers notice different problems. Brand and marketing teams may focus on expression, mood, and customer perception. Architects may look at geometry, façade detailing, material intent, and drawing consistency. Merchandising teams may focus on product hierarchy and display logic. Property or construction reviewers may notice coordination implications, access points, service zones, or constraints related to the existing site.
That is why a sequenced review process is useful. Camera viewpoints can be approved first. Then the team can review broad massing, fixture placement, material direction, and lighting mood before moving into higher fidelity. Photorealism should increase as decisions become more settled. More realism is not always more useful at the earliest stage; sometimes a faster comp helps the team make a clearer decision.
Comments should also be consolidated. If brand, design, merchandising, and property teams send separate rounds of feedback, the visualization team may receive conflicting instructions. A single coordinated markup or decision log reduces the risk of revising the same area multiple times for different reviewers.
Output specs, reusable files, and handoff questions to settle early
Output requirements should be agreed before final production. A rendering for a website hero, board deck, press release, brochure, leasing package, construction hoarding, or large-format display may need a different aspect ratio, crop strategy, pixel size, and delivery format. If those channels are identified late, the final composition may not have enough room for the crop or the required resolution.
For some production use cases, informal production examples may reference high-resolution final raster images. Those examples can be a helpful planning reference, but they are not a universal standard. The right size depends on final use, aspect ratio, print method, display size, software workflow, and production constraints. Large-format needs should be discussed specifically rather than handled as a vague request for a larger file.
Some projects also benefit from layered outputs or render channels. Material ID, ZDepth, reflection, refraction, or similar passes can give the postproduction team more control over glazing, lighting mood, branded surfaces, and selective adjustments. They are not needed for every image, but they can be worth requesting when future edits, campaign crops, or controlled refinements are likely.
Commercial and handoff questions are just as important. Ownership, usage rights, revision rounds, layered files, source-file access, and future reuse are not standardized. They should be agreed explicitly. A marketing team may approve images for web use, then later need press crops, on-site graphics, or reuse in another market. If those rights and formats were not discussed, the team may have to revisit scope after the images are complete.
If the flagship concept may influence future stores, clarify whether the visualization model is being built as a one-off presentation scene or as a reference that may support rollout adaptation. Reuse can be valuable when a brand has a repeatable format, but a bespoke flagship tied to a specific site, street context, or architectural shell may need significant adaptation before it works elsewhere.
When interactive or real-time flagship store rendering is worth it
Interactive or real-time flagship store rendering can be useful when the team needs to review the space dynamically. It may help remote reviewers understand the store as a sequence rather than a set of fixed views. It can also support experiential presentations when the customer journey, sightlines, or movement between display zones is central to the concept.
That does not mean interactivity should be treated as the default choice. A real-time workflow can add preparation, cleanup, testing, and coordination requirements. If the main need is a small set of controlled hero images, a still package may be more direct. If the team needs to move through the space, test viewpoints, or present the environment in a more immersive way, interactivity may be worth the extra planning.
BIM-to-real-time workflows should also be discussed carefully. In some Revit-to-Unreal style workflows, the active 3D view can affect what is exported, and parametric constraints do not automatically carry into the real-time environment. Visibility settings, model organization, material cleanup, camera preparation, and version status can all affect the result.
The practical question is not whether real-time visualization sounds impressive. The question is whether it supports a specific review or presentation need. If it does, confirm the toolchain, export assumptions, model version, visibility settings, and cleanup expectations before promising an interactive deliverable. If it does not, a focused set of still renderings may give the team clearer images with fewer moving parts.
For most flagship projects, the best package is the one that matches the decision in front of the team. That may be a concise set of premium stills, a broader narrative sequence, or an immersive review environment. The scope should follow the use, the available information, and the level of certainty in the design.
FAQ
How many images are usually included in a flagship store rendering package?
There is no fixed universal count. A typical package is built around one or more hero stills plus a planned sequence of exterior, storefront, entry, interior, category-zone, and detail views. The better question is what each image needs to explain for review, launch, leasing, or internal presentation.
Do I need animated walkthroughs for a flagship store, or are still renderings enough?
Still renderings are often enough when the team needs controlled hero views, deck imagery, press crops, or clear design review images. Animated walkthroughs or interactive panoramas are more useful when remote reviewers need to understand spatial flow, customer movement, or the experience of moving through the store.
What files and information should I prepare before commissioning flagship store rendering?
Prepare current floor plans, sections or ceiling heights, reflected ceiling or lighting information where available, fixture details, merchandising assumptions, material and finish schedules, signage information, and BIM or CAD files if they exist. Also clarify the audience, intended use, deliverables, and sign-off process.
What resolution should flagship store renderings be delivered at?
Resolution depends on the final channel. Web, presentation decks, press, brochures, hoarding, and large-format displays can require different sizes and crops. High-resolution final images may be useful planning references for some production use cases, but they should not be treated as a universal rule.
Can a flagship store rendering model be reused for future store rollouts?
Sometimes. Reuse is more realistic when the brand is developing a repeatable retail format or standardised concept. A one-off flagship tied to a specific site, shell, façade, or local context may need significant adaptation before the model can support another location.
What to Do Next?
Start by matching each requested image or deliverable to a specific use. Note whether it is for executive review, landlord presentation, leasing material, press, launch planning, internal design review, or future rollout reference. That single step helps prevent a vague rendering package from becoming a collection of attractive images with unclear responsibilities.
Create a preliminary view list before production begins. Include the exterior hero, storefront or signage view, entry sightline, wide interior perspective, key category zones, service or checkout area, and any detail views that matter to the concept. Then decide whether stills are enough or whether animation, panorama, or real-time review has a clear purpose.
Gather the source information that will affect accuracy: current plans, sections, ceiling heights, fixture details, merchandising assumptions, material schedules, signage intent, lighting references, and current BIM or CAD files where available. Identify which files are authoritative if drawings, models, and markups differ.
Decide who reviews what and when. Brand, architecture, merchandising, marketing, leasing, property, and construction teams may all care about different details. A staged review sequence with consolidated comments can make those differences easier to manage.
Finally, confirm output specs, aspect ratios, resolution needs, revision expectations, usage rights, ownership questions, layered output requirements, and any future reuse plans before final rendering starts. These decisions are easier to settle early than after the images are complete.
RM Design Studio
Ready to discuss your project?
Email your project brief to RM Design Studio, or call us to discuss the renderings you need.