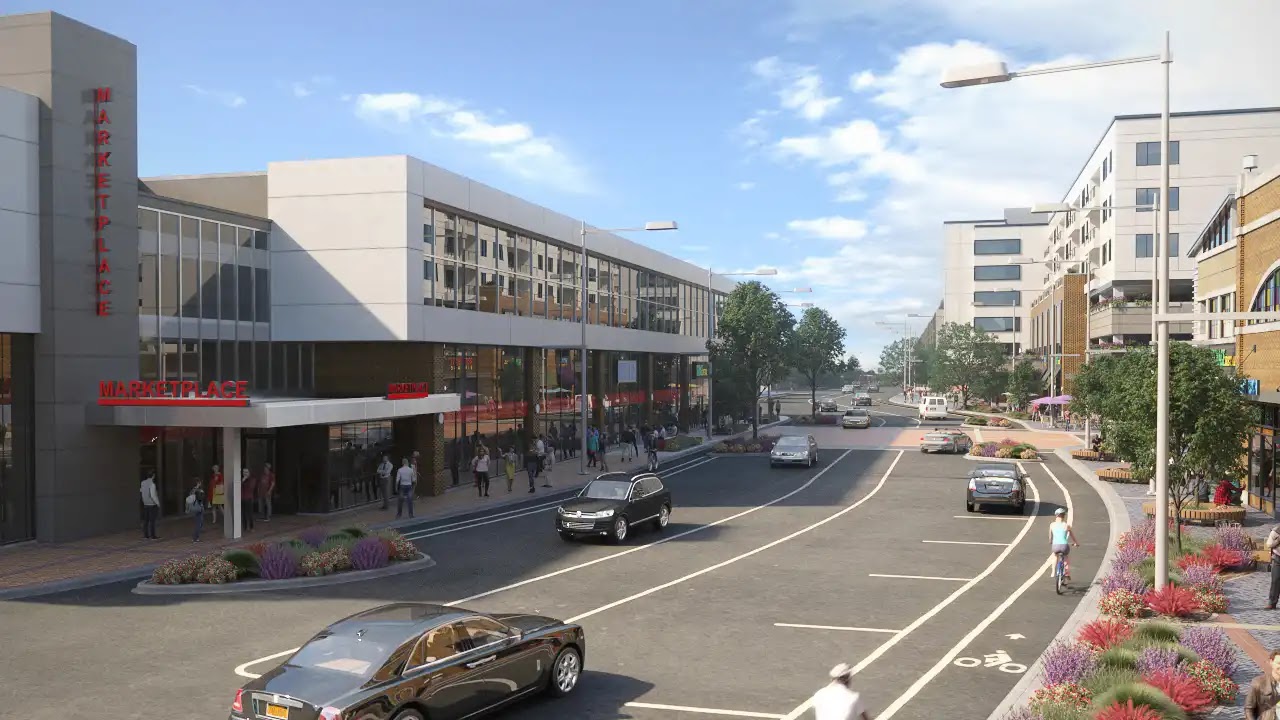
Mixed use development renderings usually work best as a coordinated package, not a single hero image. Most projects need an exterior context view, one or more street-level retail frontage views, a residential or amenity view, and, when the building organization is hard to read, a sectional or axonometric image that explains how uses stack and connect.
The real question is not just how many images to commission. It is what each image needs to help someone understand: urban fit, leasing potential, pedestrian experience, circulation, public realm, or the relationship between retail, residential, parking, and amenities. Once that is clear, the scope, source files, review process, and output requirements become much easier to define.
Table of Contents
- What mixed-use development renderings usually include
- Choose each view by the decision it needs to support
- What you need to prepare before rendering starts
- How style, workflow, and deliverables affect the final package
- Common mixed-use rendering mistakes that create rework or confusion
- How to assemble a rendering package that actually helps the project move forward
- FAQ
- What to Do Next?
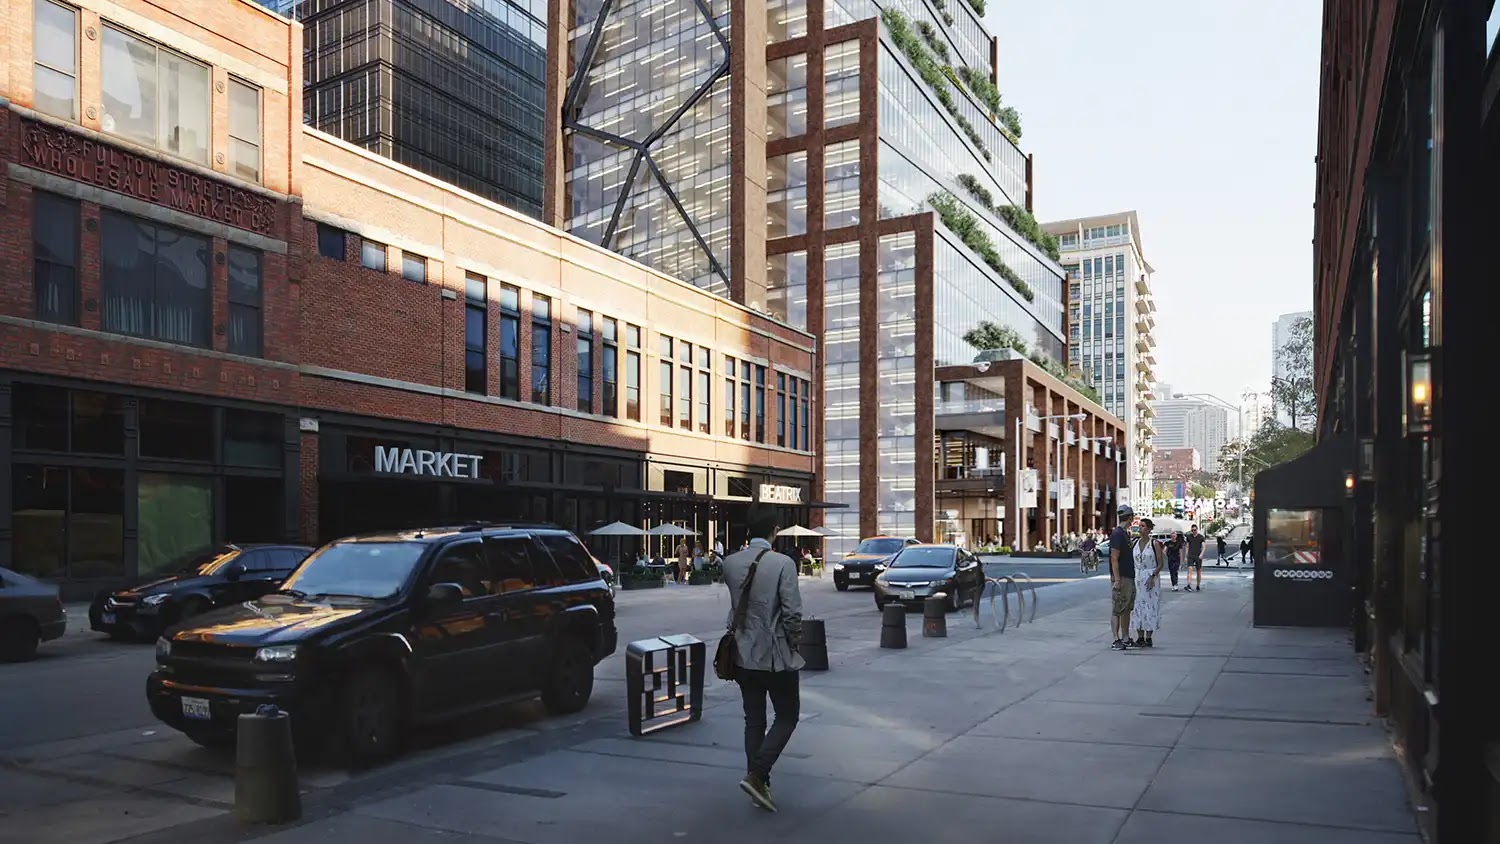
Street-Level View
Assess Street Activation Along the Mixed-Use Frontage
Examine how the building meets the street through storefronts, sidewalks, and urban context.
What mixed-use development renderings usually include
A typical mixed-use package is a small set of coordinated still views, each doing a different job. That usually means one contextual exterior hero that shows the building in its urban setting, one or more street-level retail frontage views that show the pedestrian edge, a residential or amenity view that communicates lived experience, and a site-context view when the larger district relationship matters.
That core set covers what a single image usually cannot. A polished aerial or corner perspective may show massing and presence, but it often says very little about storefront depth, sidewalk conditions, drop-off logic, public space, or how upper uses relate to the street. Mixed-use projects ask one image set to explain several things at once, so the package has to be broader than an isolated beauty shot.
Some projects also need an explanatory view that is less atmospheric and more legible. A sectional cutaway or axonometric program stacking diagram becomes especially useful when the development includes concealed parking, podium conditions, roof amenities, multiple access points, or a complicated relationship between ground-floor retail and upper residential or office uses.
Still images remain the backbone of most mixed-use presentation packages. Investor decks, approval boards, leasing brochures, websites, and internal review presentations usually depend on strong stills because they are easy to place, crop, compare, and reuse. Walkthroughs, panoramas, or interactive tools may add value in some cases, but they usually support the package rather than replace it.
A useful package usually makes the project legible at four levels: context, street experience, program mix, and identity. If one of those is missing, a developer can have one attractive exterior image and still struggle to explain the project to leasing teams, investors, or reviewers.
Choose each view by the decision it needs to support
The most reliable way to scope mixed-use views is to start with the decision each image needs to support. Not every audience needs the same evidence, and not every image should try to do everything.
If the main question is urban fit, start with a contextual exterior rendering. This is the right anchor when the audience needs to understand massing, scale, access, frontage, and how the project sits on the street or within a larger development area.
If the main question is ground-floor credibility, prioritize a street-level rendering. That is often the most important image when retail leasing, public-facing communication, storefront visibility, and pedestrian activity are central concerns. Storefront glass, signage zones, outdoor seating, lighting, curb edges, planting, and the depth of the retail frontage can do more to establish believability than another distant exterior.
If the main question is lived experience, a residential or amenity view becomes more important. That might be a lobby, shared terrace, pool deck, coworking lounge, or a residential-facing exterior that shows balcony rhythm, privacy, and light.
If the main question is how the project works, use an explanatory image. Program stacking, circulation, parking access, loading, podium relationships, and amenity placement are often clearer in an axonometric or section than in a photoreal street perspective.
That leads to an important style decision. Photoreal rendering is valuable when atmosphere, leasing appeal, or polished presentation matters. But explanatory needs often call for clearer overlays, cleaner massing reads, or diagrammatic emphasis. A community meeting image that needs to show access and public-realm impacts should not necessarily be treated like a lifestyle brochure spread.
Many mixed-use projects need both: warm leasing views, straightforward contextual images, and sometimes a program diagram. Those are not conflicting goals as long as the package is planned intentionally and conceptual elements are not presented as confirmed commitments.
What you need to prepare before rendering starts
Rendering quality depends heavily on the quality and clarity of the handoff. Before production starts, identify the authoritative model and the current drawing set. On mixed-use work, different teams may be working from different Revit files, linked consultant models, DWG backgrounds, or separate versions of the facade package. If authority is unclear, the rendering effort can quickly turn into coordination work.
A BIM Execution Plan, or at least a written handoff brief that serves a similar purpose, is worth establishing early. It should clarify file formats such as Revit, IFC, or DWG, who authored which model elements, how the model is federated, what version naming will be used, and what level of development is expected for the views being produced. If the team does not know which file governs storefront geometry, unit layouts, or landscape extents, revision risk rises quickly.
Just as important, confirm whether the model is actually render-ready. An early model can be enough for concept visuals, especially if the goal is massing or broad site communication. At that stage, information may be closer to LOD 100 or 200. But as a common workflow preference rather than a formal requirement, a more reliable photoreal exterior may benefit from geometry and coordination closer to LOD 300, depending on the rendering purpose and project stage, and sometimes clearer interface conditions as well. Openings, parapets, storefront framing, balcony edges, canopies, screening, and facade depth matter visually.
That is why scope should state whether model cleanup or rebuilding is included. Documentation models are not always optimized for presentation imagery. Heavy geometry, missing elements, placeholder materials, and incomplete context are common. A BIM handoff can save time, but it is not an automatic shortcut.
Site and context inputs deserve the same level of attention. For mixed-use development visualization, gather available site surveys, existing-condition references, surrounding massing, adjacent street conditions, landscape and public-realm information, facade design, storefront assumptions, material schedules, and any known tenant or signage assumptions.
Finally, confirm where the images will be used before the views are produced. A web image, planning board, leasing brochure, presentation deck, panorama, or video each brings different cropping, orientation, and resolution needs. If editable files or broader usage rights are expected, those should be clarified contractually at the beginning, not after delivery.
Free Guide
Plan Better Renderings Before Your Next Presentation
Use this quick guide to prepare clearer visual direction before project meetings, marketing reviews, or stakeholder presentations.
- Clarify the views your team needs before rendering starts
- Compare exterior, interior, and amenity visuals with more focus
- Prepare stronger notes for design, leasing, or marketing discussions
A practical checklist to help your team prepare.
How style, workflow, and deliverables affect the final package
Once the views are defined and the handoff is clear, the next question is how polished, explanatory, or flexible the final package needs to be. This is where many scopes drift, because teams ask for every format that sounds useful without deciding what each one is for.
Photoreal images are often the best choice when the package needs atmosphere: evening retail glow, occupied terraces, lobby mood, or the appeal of the street edge once the project is built. They are good at helping viewers feel the place.
Diagrammatic or sectional views are better when the project needs to be understood quickly. If the issue is parking access, podium organization, loading, residential entry separation, or how an amenity deck sits above retail, clarity usually matters more than mood.
Still images should usually anchor the deliverables. They are the most adaptable format across approval boards, brochures, websites, investor decks, and internal review presentations. Even if a project adds a walkthrough or panorama, it is still the still-image set that tends to carry the message in the widest range of situations.
Interactive formats should be added for a reason, not by default. A walkthrough, panorama, VR presentation, or real-time review workflow can be useful when the team needs fast iteration, a strong sense of sequence, or a way for stakeholders to explore public space and circulation more actively. But not every project benefits enough to justify the added workflow.
It also helps to separate review workflow from final-output workflow. Real-time tools are often helpful during iterative review because camera changes, lighting studies, and broad design options can be assessed quickly. Final polished marketing imagery may still follow a more production-oriented rendering process depending on the level of finish expected.
Resolution is another area where teams often over-request without gaining much. Large-format print, detailed brochures, and flexible future cropping may justify higher pixel dimensions. Internal review slides, most web galleries, and many presentation decks usually do not need the same output size. For digital use, pixel dimensions matter more than DPI alone.
Common mixed-use rendering mistakes that create rework or confusion
The most common mixed-use rendering mistake is commissioning one impressive exterior and assuming it covers the whole project. It rarely does. The image may look convincing from a distance while leaving the sidewalk experience, access logic, and vertical relationships almost completely unexplained.
The second mistake is starting too early with unclear inputs. If the authoritative version of the model, facade design, storefront assumptions, materials, or surrounding context has not been confirmed, the rendering team has to fill gaps somehow. That usually means guesswork, cleanup, rebuilding, or repeated revision cycles once the missing information catches up.
A third issue is inconsistent visual language. Mixed-use projects sometimes split residential, office, and retail views across separate teams or disconnected workflows. That can work, but only if there is a continuity plan for camera logic, entourage style, lighting direction, material interpretation, and context modeling.
Another avoidable problem is showing more specificity than the design actually supports. Branded storefronts, exact tenant types, mature landscape, fully developed signage, or highly specific public-realm details may be useful in some leasing materials, but they can become misleading when reused in broader public-facing settings before those elements are confirmed.
Output mistakes are less dramatic but common. Teams sometimes approve images for internal review, then realize too late that the same files are not suitable for a printed board, brochure spread, or large presentation display. Cropping, orientation, and resolution should be settled before final production.
And one issue deserves extra emphasis: ground-floor retail edge quality. Weak storefront glass, vague signage zones, flat sidewalk treatment, missing curb definition, unresolved lighting, or thin public-realm detail can make an otherwise sophisticated project look unconvincing. In mixed-use work, the street edge often carries more persuasive weight than upper-floor detail.
How to assemble a rendering package that actually helps the project move forward
The strongest packages start with questions, not image count. Before anyone decides whether the project needs four views or ten, define what planners, investors, leasing teams, marketing teams, and internal reviewers actually need to understand. In most cases, those needs fall into two categories: what the project feels like and how the project works.
That distinction keeps the package balanced. Experiential views show arrival, retail energy, amenity appeal, and neighborhood presence. Explanatory views show context, access, program mix, circulation, and public realm. If a package leans too far in one direction, it either looks attractive but vague or clear but emotionally thin.
It also helps to treat the entire set as one coordinated narrative. Residential, retail, office, parking, and public realm should feel like parts of the same development, not separate image families with different assumptions and visual priorities.
Review responsibility should be assigned before markup begins. Mixed-use packages often draw comments from architects, developers, leasing teams, landscape designers, interior designers, and marketers. A better approach is to decide who approves architecture, who approves leasing assumptions, who confirms interiors, who reviews planning accuracy, and who confirms final usage rights.
One written package brief can hold the whole process together. It should record intended audience and use for each image, required view types, authoritative source files, version control, known gaps, unresolved assumptions, output formats, resolution needs, and rights or permitted-use expectations.
In the end, the best mixed use development renderings are not the largest package or the most cinematic package. They are the set of views that answers the real project questions clearly, shows the development responsibly, and gives each audience the information it actually needs.
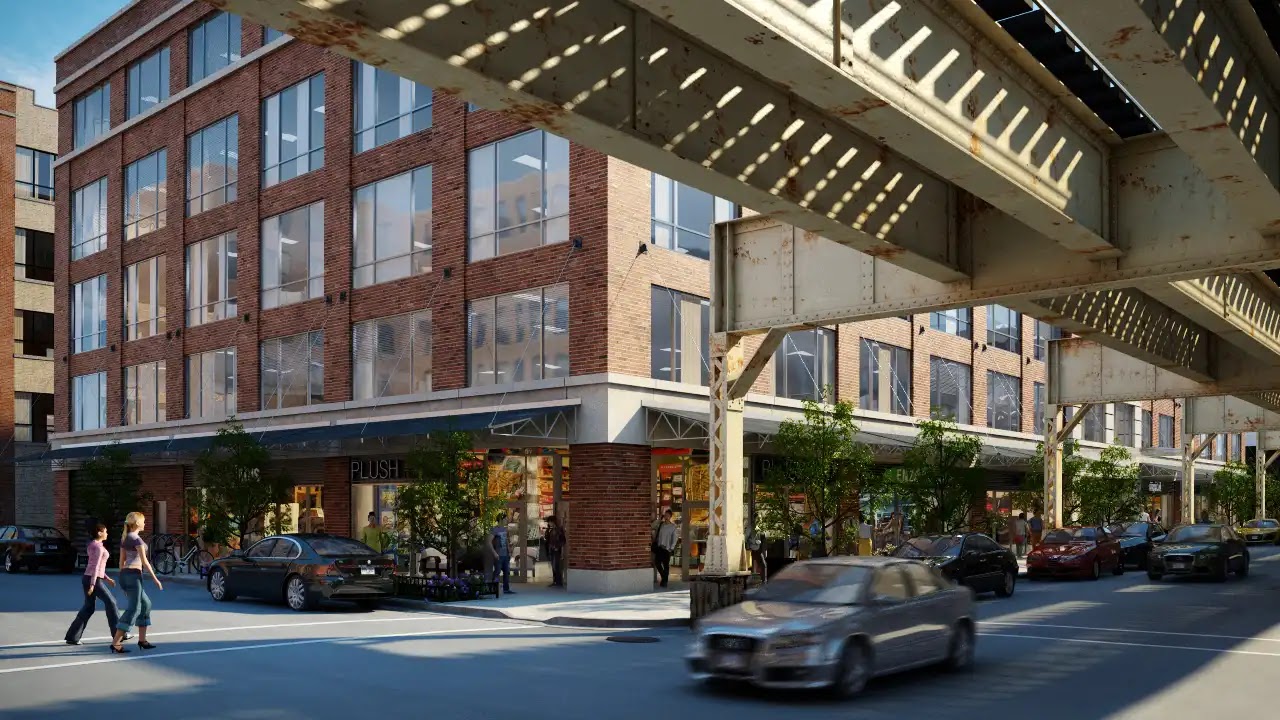
Retail Frontage
Assess Street-Level Presence Under Transit Infrastructure
Examine how the retail frontage sits within a dense urban mixed-use setting.
FAQ
How many renderings does a mixed-use development usually need?
There is no fixed number, but most projects need a small coordinated set rather than one image. A common starting package includes a contextual exterior, a street-level retail view, a residential or amenity view, and, when the project is complex, a sectional or axonometric explanatory view.
What is the most important view for mixed-use development renderings?
Usually there is not one universally most important view. A contextual exterior often anchors the package, but a street-level retail view may matter more for leasing and public perception, while a sectional or axonometric view may be more useful for circulation or program stacking.
Can you start rendering from an early BIM model?
Sometimes, yes, especially for concept or massing visuals. But early BIM models are not always ready for reliable photoreal rendering. Geometry may be incomplete, materials may be placeholders, and storefront or facade details may still need cleanup or rebuilding.
Do mixed-use projects need photoreal renderings for approvals?
Not always. Photoreal imagery can help in some presentations, but approval and public-outreach uses often need clear context, access, massing, and public-realm explanation more than lifestyle-heavy realism. Diagrams, overlays, and sectional images may be more appropriate depending on the audience.
What should be included in a mixed-use rendering brief?
Include the intended use and audience for each image, required view types, the authoritative model and drawing set, site and context references, facade and material information, tenant or signage assumptions, unresolved items, review authority, output formats, resolution needs, and image-rights expectations.
Free Guide
Plan Better Renderings Before Your Next Presentation
Use this quick guide to prepare clearer visual direction before project meetings, marketing reviews, or stakeholder presentations.
Prefer to talk it through? Email us at info@rmdesignstudio.com or call 630.540.1222.
What to Do Next?
Before commissioning a rendering package, define what each image needs to explain. If a view does not support a specific approval, leasing, investor, marketing, or design-review need, it may not belong in the scope.
Create a simple matrix for the package. For each planned image, note the audience, the question it answers, and the view type that fits best. This quickly shows whether the set covers context, street experience, and program logic or whether it leans too heavily on one kind of image.
Then gather the inputs that will control quality: the authoritative BIM or CAD files, the current drawing version, site survey or existing-condition references, surrounding context, facade information, storefront assumptions, and material schedules. If any of those are incomplete, document the gaps instead of letting them stay implicit.
Make unresolved assumptions visible. If tenant branding, landscape maturity, signage, or some public-realm details are still conceptual, record that in the brief so those elements are reviewed as placeholders rather than treated as confirmed design commitments.
Finally, match deliverables to actual use. Confirm whether the package needs web images, a presentation deck, a leasing brochure, planning boards, print-ready files, or a walkthrough. Assign who approves architecture, leasing assumptions, interiors, planning accuracy, and permitted use of the final images.