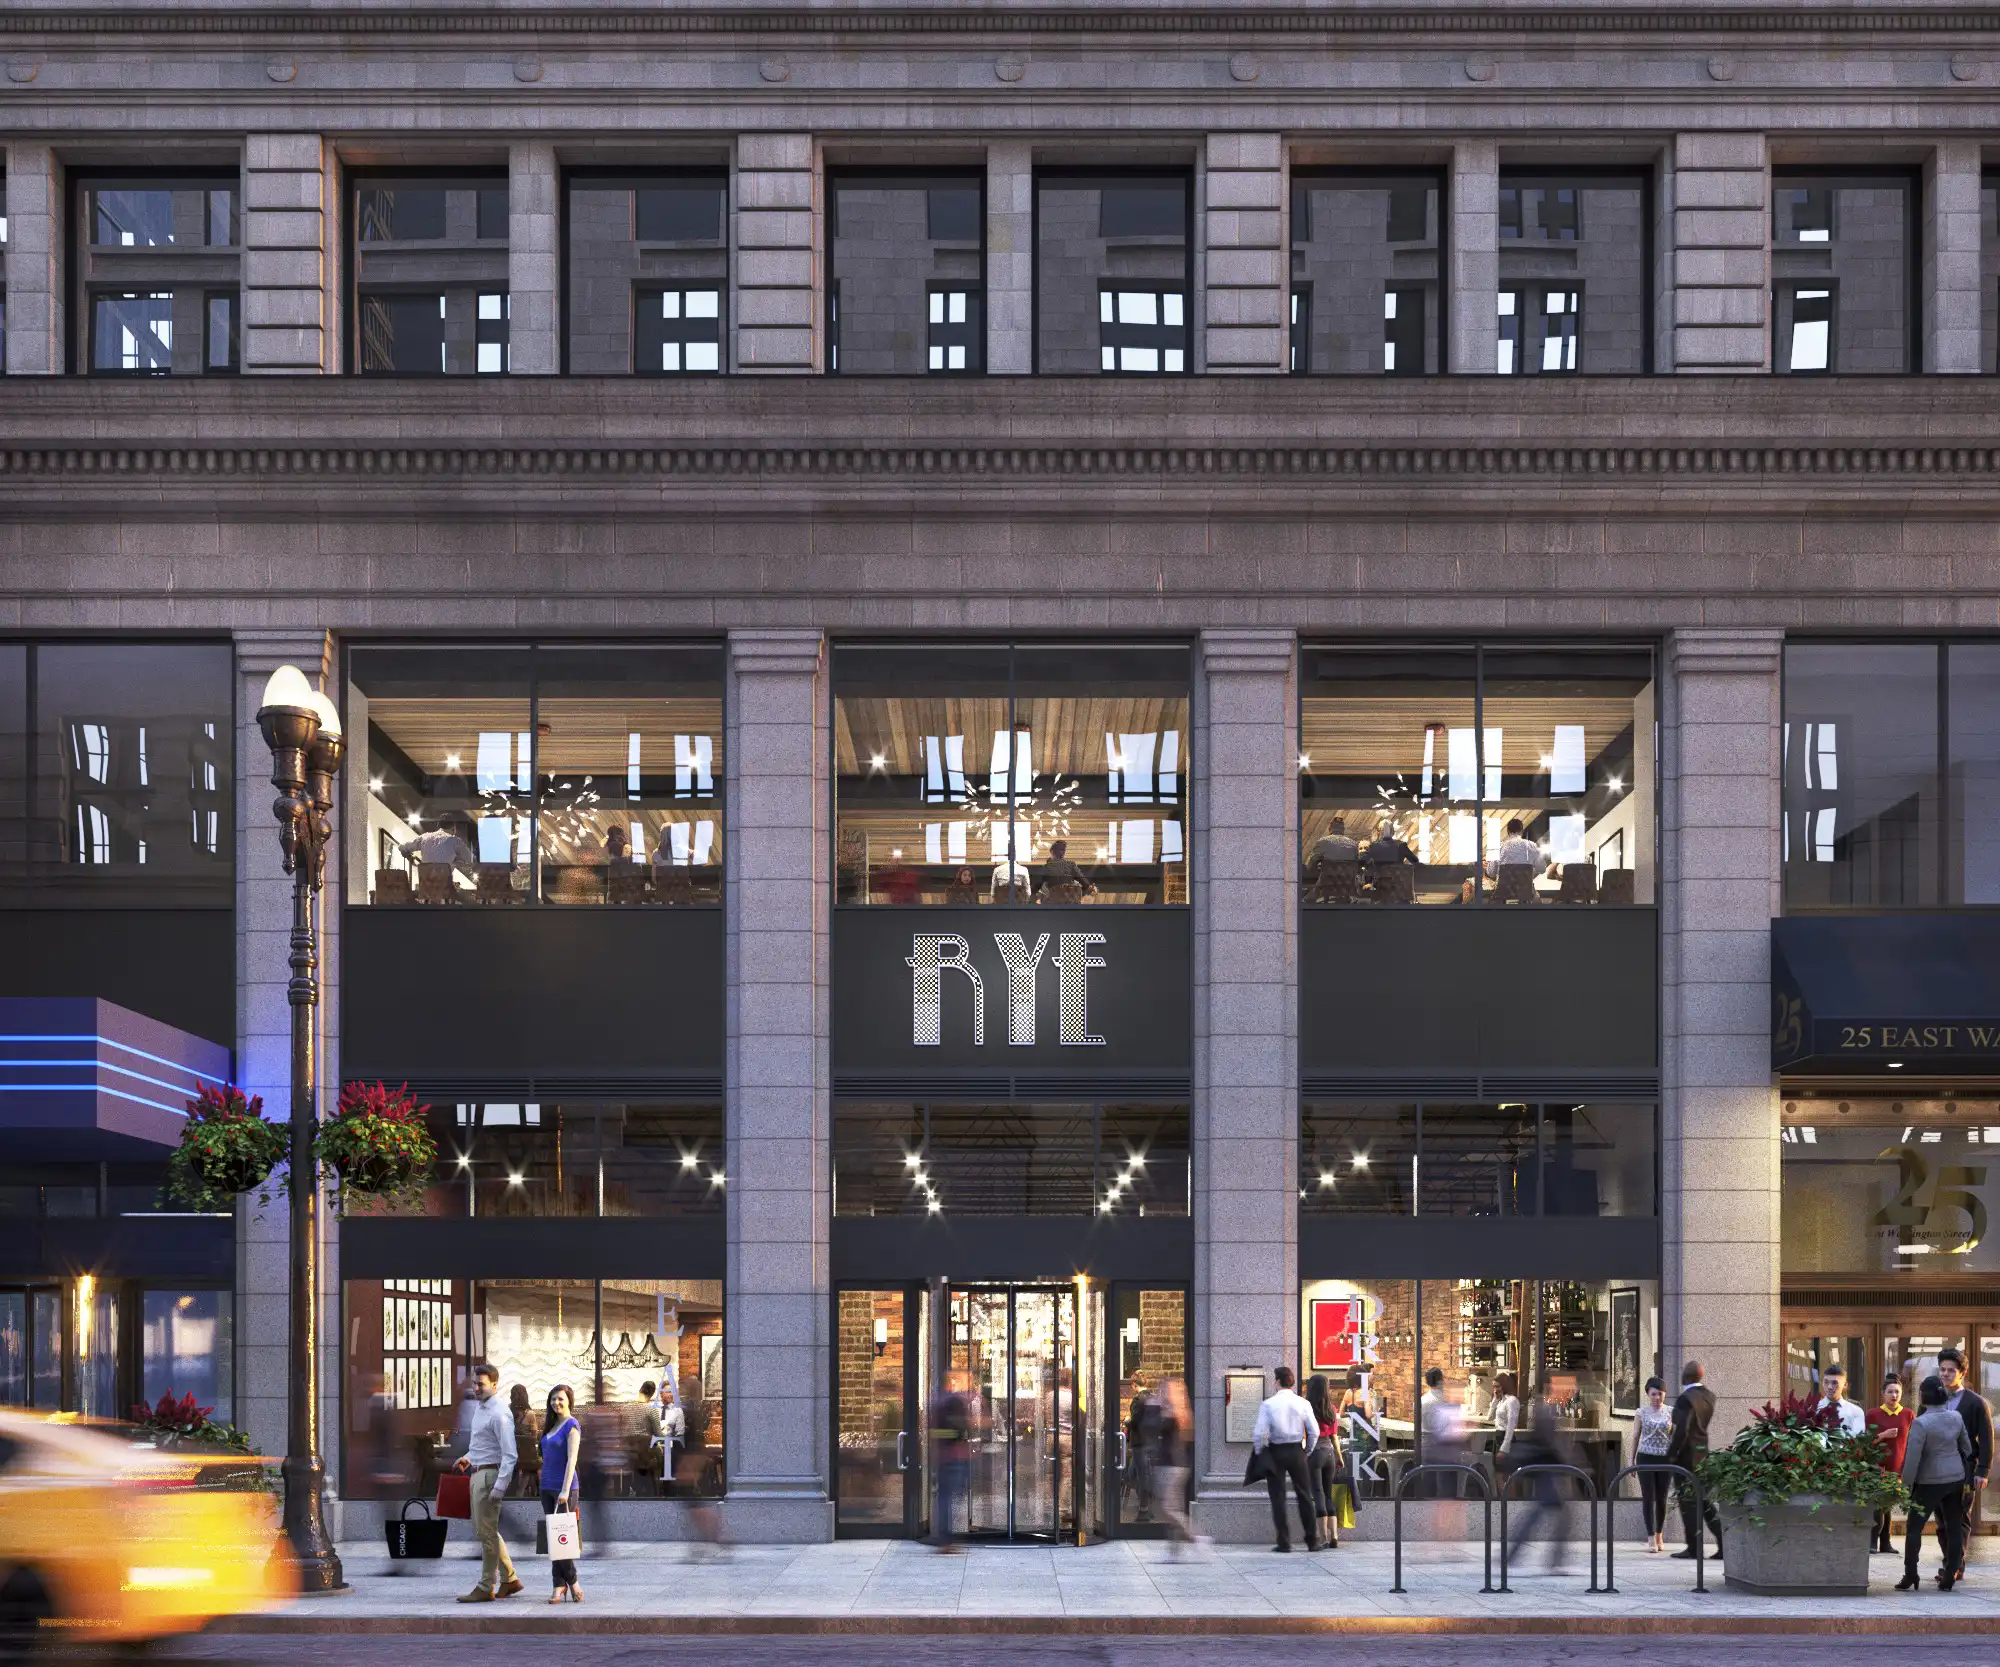
Store prototype rendering is used to visualize and approve a repeatable retail concept before rollout. It helps a brand, architect, real estate team, merchandising group, and leadership group look at the same proposed store system before it is adapted to multiple locations. The work is most useful when the brief is built from authoritative drawings, fixture data, finish direction, signage standards, lighting intent, and clear decisions about file use and reuse.
A prototype rendering can look persuasive and still be poorly scoped for rollout. If the wrong views are chosen, if fixture dimensions are guessed, if review comments arrive from several departments separately, or if source-file rights are left vague, the images may not answer the questions the team actually needs to approve. The sections that follow explain what the rendering is for, what to prepare, how to match deliverables to approval stage, and what to define before production begins.
Table of Contents
- What store prototype rendering is actually for
- What inputs a rendering partner needs before work starts
- Which deliverables make sense at each approval stage
- How to choose the right views, detail level, and file outputs
- What should be defined in the SOW before production begins
- Common mistakes that make prototype renderings less useful
- FAQ
- What to Do Next?
RM Design Studio
Planning a rendering project?
Talk with RM Design Studio about your project, the views you need, and your timeline.
What store prototype rendering is actually for
Store prototype rendering is not just a polished image of a future shop. It is a way to examine a repeatable retail concept before the brand commits to a pilot, a wider rollout, or a family of location-specific adaptations. The rendering package should help the team see how the prototype store design behaves as a system: entry, circulation, fixture zones, checkout, signage, lighting, materials, and brand moments.
For retail decision-makers, the important question is not only whether the store looks appealing. It is whether the concept can be understood and reviewed consistently by the people who need to approve it. A leadership team may care about the overall customer impression. A merchandising team may need to see sightlines, display visibility, and fixture spacing. An architecture or project management team may need to compare the visualization against drawings, storefront constraints, and documented design intent.
Good retail prototype visualization makes these conversations more concrete. It can show whether the main aisle feels clear, whether the checkout queue conflicts with circulation, whether a feature wall is visible from the entry, or whether the storefront identity reads from the customer approach. Those are practical review questions, not decoration.
At the same time, a rendering should not be treated as proof of ADA compliance, code compliance, structural feasibility, or construction readiness unless those responsibilities are explicitly assigned to the appropriate professionals. The image can support visual and operational review, but it does not replace technical verification.
What inputs a rendering partner needs before work starts
A useful store prototype rendering brief starts with one consolidated set of inputs. Scattered emails from brand, architecture, merchandising, real estate, and operations teams can easily create conflicting assumptions. Before production begins, the client team should identify which files are current, which drawings are authoritative, and which standards control the work.
The core inputs often include floor plans, elevations, fixture layouts, fixture dimensions, catalog references, material and finish references, signage rules, brand guidelines, and lighting intent. Reflected ceiling information is helpful when lighting, ceiling elements, acoustic treatments, or feature fixtures affect the view. Storefront photos, site context, landlord criteria, or neighboring facade conditions may also matter when the prototype needs to be shown in a realistic exterior condition rather than as an isolated interior.
Not every early concept needs a complete construction-level package. A lower-fidelity concept study can begin with less information if the team understands what is being assumed. The problem comes when a rendering is used for approval while major ingredients are still undefined. Missing fixture sizes, unclear finish direction, uncertain signage hierarchy, or incomplete storefront context all force the rendering partner to interpret. Those interpretations may be reasonable, but they should not be mistaken for approved standards.
A good brief also states the intended use of each image. Internal concept testing, executive review, pilot sign-off, landlord presentation, web use, and print use may call for different framing, detail, and output requirements. Naming the use early helps the rendering partner model and compose the work around the decision being made.
Which deliverables make sense at each approval stage
The right deliverables depend on where the retail concept sits in the approval process. Early in concept development, lower-fidelity views may be more useful than polished final images. At that stage, the team may still be testing fixture packages, merchandising zones, finish families, or the relationship between entry, checkout, and primary display areas. A less finished view can keep attention on layout and direction rather than on whether a wood tone or graphic treatment is final.
Once the prototype direction is more stable, a defined set of key approval views usually becomes the center of the package. As a planning reference, many teams can start by thinking in terms of roughly four to ten important views, though that range is not a rule. A compact shop may need fewer. A complex flagship prototype, multi-zone store, or concept with several storefront conditions may need more. The point is to choose views because they answer approval questions, not because a larger image count sounds more complete.
Common approval views include the storefront, entry sequence, main merchandising run, checkout, feature wall, customer circulation path, and any signature brand moment that will repeat across locations. If the concept depends on ceiling lighting, display density, wall graphics, or fixture hierarchy, the package should include views that make those decisions visible.
Photorealistic sign-off images are usually better reserved for pilot approval, executive review, or marketing use after the concept is reasonably settled. Animation, VR, or interactive assets can be helpful when the team needs remote immersion, circulation testing, or a walk-through style presentation, but they should be scoped because they solve a specific review problem. They are not automatically better than still images for every prototype decision.
Free Guide
Plan Better Renderings Before Your Next Presentation
Use this quick guide to prepare clearer visual direction before project meetings, marketing reviews, or stakeholder presentations.
- Clarify the views your team needs before rendering starts
- Compare exterior, interior, and amenity visuals with more focus
- Prepare stronger notes for design, leasing, or marketing discussions
Enter your email to access the guide.
How to choose the right views, detail level, and file outputs
Approval renderings should be organized around the decisions the team needs to make. A dramatic camera angle may look impressive, but it can miss the checkout queue, signage hierarchy, display sightlines, or entry threshold that actually matter for a repeatable store concept. Start by listing the questions each image must answer, then choose the camera location and composition.
For many retail prototypes, useful views include the storefront from the customer approach, the entry threshold looking into the store, the primary aisle, key merchandising zones, checkout, a feature wall, and any branded environmental graphics that define the concept. If regional adaptations are expected, it may also be useful to show how the same prototype language handles a different storefront width, corner condition, or ceiling height.
Level of detail should follow the stage of work. Concept visuals may only need enough detail to compare layout, massing, material direction, and fixture placement. A later rollout study may need more accurate fixture dimensions, millwork profiles, lighting placement, signage details, and display logic. Overmodeling too early can spend time on details that are likely to change. Undermodeling too late can leave the team without enough information to review the prototype properly.
File outputs should also be defined by use. Internal approval images, presentation decks, web content, print collateral, and motion deliverables do not all need the same formats or resolutions. If the workflow involves BIM or CAD exchange, confirm expectations before contracting. RVT, DWG, IFC, FBX, OBJ, or other formats may be relevant depending on the client files and vendor pipeline, but no single format is required for every engagement. The important step is to agree on what is being delivered and what can be reused.
What should be defined in the SOW before production begins
The statement of work should make the rendering engagement measurable enough that both sides know what is included. At minimum, it should define the deliverables, view count, intended use, milestone sign-offs, review rounds, revision limits, acceptance criteria, payment triggers, and the person responsible for consolidating client comments.
That single point of contact is especially important in retail prototype work. Brand, design, real estate, merchandising, operations, procurement, and leadership may all have valid input. If those comments arrive separately, the rendering partner may receive contradictory directions: one reviewer asks for a fixture to move, another asks for the same fixture to stay, while a third comments on a finish that is no longer current. Consolidated feedback does not remove internal debate, but it prevents that debate from becoming unclear production direction.
The SOW should also state whether the client needs final images only, editable source files, BIM or CAD exchange, reusable 3D assets, or a broader asset library for future stores. A one-time pilot presentation may only need final still images. A multi-location rollout may justify source-file access or reusable model components so the prototype can be adapted to different footprints, storefronts, or landlord conditions.
Ownership, licensing, source-file access, and reuse rights should not be assumed from payment for final images. They should be written into the agreement in plain terms. The same is true for technical review responsibilities. If ADA, code, structural, millwork, or construction accuracy checks matter to the approval, the responsible party should be named rather than inferred from the rendering scope.
Common mistakes that make prototype renderings less useful
One common mistake is starting too soon with unstable fixture information. If fixture dimensions, catalog data, spacing rules, or merchandising standards are not confirmed, the rendering may show a store that looks plausible but does not reflect the intended prototype. Early assumptions are sometimes necessary, but they should be labeled and reviewed before the images are used for broader sign-off.
Another mistake is treating the work as marketing imagery only. Retail prototype rendering can certainly support presentations, but the deeper value is in reviewing repeatability. The team should be looking at circulation, display visibility, storefront identity, lighting intent, checkout behavior, brand signage placement, and how the same design language may adapt across locations.
Uncoordinated feedback is another avoidable problem. When every department sends separate markups, approval status becomes hard to track. A rendering partner needs a clear set of comments, preferably tied to a milestone: concept direction, design development, material confirmation, or final sign-off. Without that structure, revisions can become a loop rather than a decision process.
Teams also run into trouble when they move into photorealistic images before finishes, signage, lighting direction, and fixture packages are reasonably stable. Late changes are sometimes unavoidable, but changing major ingredients after detailed modeling, texturing, and lighting can require more rework than the team expected.
The final mistake is assuming that a convincing image proves more than it does. A rendering can help people see relationships clearly, but it should not be used as a substitute for code review, ADA verification, construction documents, engineering review, or field coordination unless those services are explicitly included and assigned to the proper professionals.
FAQ
How many views do you need for a store prototype rendering package?
A defined set of key approval views is usually more useful than a large image count. As a planning reference, many prototype packages can begin around four to ten important views, but the right number depends on store complexity, stakeholder group, approval stage, and final use. Choose views around decisions such as storefront identity, entry, merchandising, circulation, checkout, and signature brand moments.
What files should a client provide for retail prototype visualization?
Useful inputs often include current floor plans, elevations, fixture layouts and dimensions, reflected ceiling information when available, finish references, signage standards, brand guidelines, lighting intent, and storefront or site context. The client should also identify which drawings, models, schedules, and standards are authoritative so the rendering partner is not working from conflicting versions.
Do store prototype renderings need Revit, DWG, or other BIM-compatible files?
Not every project needs BIM-compatible exchange. If the engagement is image-only, PDFs, CAD files, reference images, and clear dimensions may be enough. For larger rollout programs, it is worth confirming RVT, DWG, IFC, or other agreed formats before contracting, especially if the client expects reusable assets, future adaptations, or coordination with architectural documentation.
Can a store prototype rendering be used to check ADA or code compliance?
Renderings can help teams visually review clearances, counters, circulation, fixture relationships, and customer paths, but they do not replace formal ADA, code, structural, or construction verification. If compliance review is required, that responsibility should be explicitly scoped and assigned to the appropriate design or client-side professionals.
Should you ask for source files or just final images for a store prototype rendering project?
It depends on intended use. A one-time pilot approval may only need final images. A multi-location rollout may justify editable source files, reusable 3D components, or BIM and CAD exchange. File access, ownership, licensing, and reuse rights should be defined in the SOW rather than assumed after final delivery.
What to Do Next?
Start by naming the decision the rendering package needs to support. Is the team testing an early concept, preparing for internal approval, signing off on a pilot store, or creating images for a later presentation use? That answer should guide the view list, level of detail, review process, and file requirements.
Next, assemble one authoritative visualization brief. Confirm which plans, elevations, fixture schedules, finish references, signage standards, lighting notes, and context materials are current. Identify one client-side point of contact to gather comments from brand, architecture, merchandising, operations, real estate, and leadership before they are sent for revision.
Then define the deliverables by stage. List the approximate view count, the decision each view supports, the intended use for each output, and whether the work is image-only or part of a broader rollout that may need reusable files. Before production begins, put acceptance criteria, review rounds, revision limits, file formats, source-file expectations, reuse rights, and technical verification responsibilities into the SOW.
RM Design Studio
Ready to discuss your project?
Email your project brief to RM Design Studio, or call us to discuss the renderings you need.